Intended Audience
This post may be of interest if you are setting up Resilio Sync for the first time under more modern versions of FreeNAS (version 11.2 and above), or, you are migrating from using Resilio Sync under legacy versions of FreeNAS (version 11.1 or earlier).
Edit (02/04/2020): There are a number of advantages to installing Resilio Sync in and iocage jail rather than use a plugin. To find out more, refer to the post Resilio Sync in a FreeNAS Jail.
Assumptions
- The guide is suitable for a small business or home network that doesn’t use a domain controller for authenticated access.
- Windows PCs are predominantly in use on the network.
- The reader has a working knowledge of FreeNAS.
- The Resilio Sync plugin has been installed on the FreeNAS server.
Background
This post is a refresh of an earlier post that was based on the legacy FreeNAS UI (FreeNAS version 11.1 or earlier) and Warden backend manager for jails and plugins. FreeNAS 11.2 brings with it an all-new UI and swaps iocage for Warden as the backend manager. To continue to receive plugin updates, it’s essential to switch to iocage.
Resilio Sync was chosen as the backup tool of choice as the sync client is available across numerous platforms and there is also a FreeNAS plugin for the server component. At the time of writing this, I am working with FreeNAS 11.2-RELEASE-U1, Resilio Sync plugin 2.6.1 and Windows 10 Home (Build 1809).
Overview
The aim of this post is to set up an automated backup of key user data from various devices such as phones, tablets and desktops into a central repository on a FreeNAS server. The repository should be readable to personnel responsible for recovering data for users. but should not be accessible to anyone else. This approach will serve to strengthen the privacy of each individuals’ data.
The key steps for setting up Resilio Sync on FreeNAS are:
- Create the group and user btsync.
- Create the backup dataset.
- Assign btsync ownership of the backup dataset.
- Create the Windows backup share.
- Adjust permissions on the Windows share.
- Configure Resilio Sync.
- Install and configure client software.
If you are migrating from using Resilio Sync under a legacy version of FreeNAS, start at Step 6.
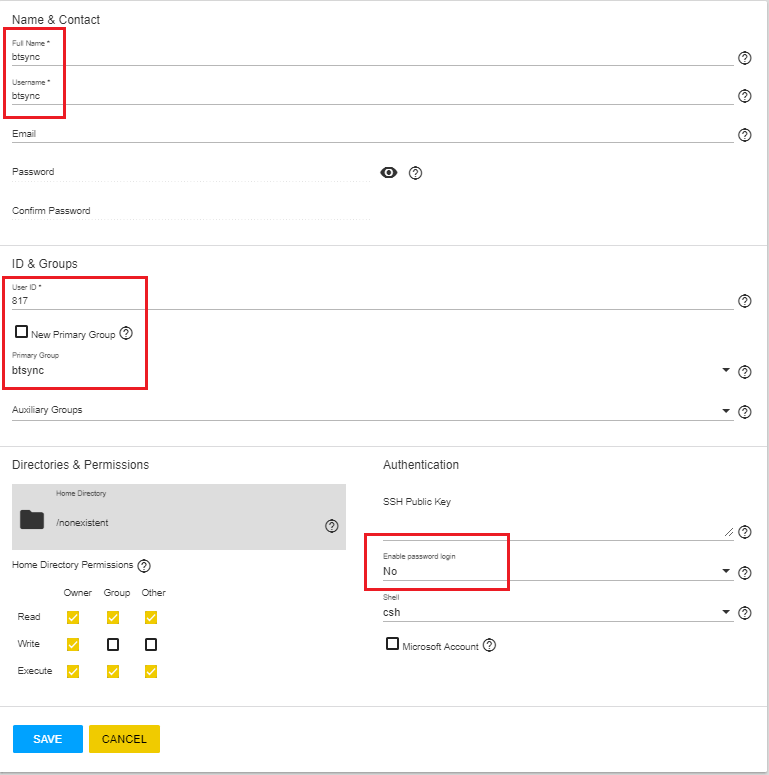
Step 1: Create the group and user btsync.
It is critical that btsync has a UID and GID of 817. Create group btsync.
Accounts ⇒ Groups ⇒ Add

Create user btsync. If you’re a belts and braces person, as btsync owns the plugin, password login is not required and can optionally be turned off.
Accounts ⇒ Users ⇒ Add
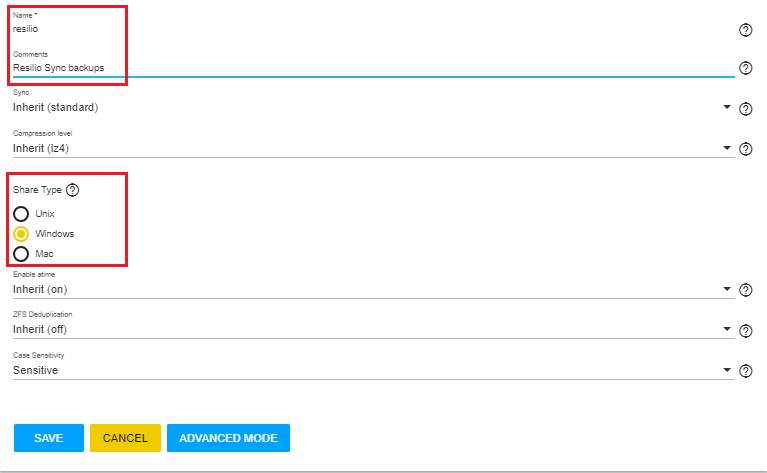
Step 2: Create the backup dataset.
As we want the dataset to be managed from Windows, ensure the share type is Windows. In the examples that follow, the backup dataset resilio resides in the pool tank.
Storage ⇒ Pools ⇒ tank ⋮ Create Dataset
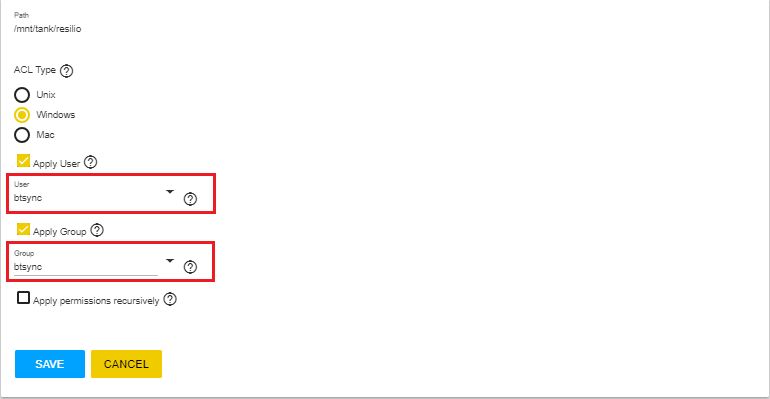
Step 3: Assign btsync ownership of the backup dataset.
Storage ⇒ Pools ⇒ tank ⇓ resilio ⋮ Edit Permissions
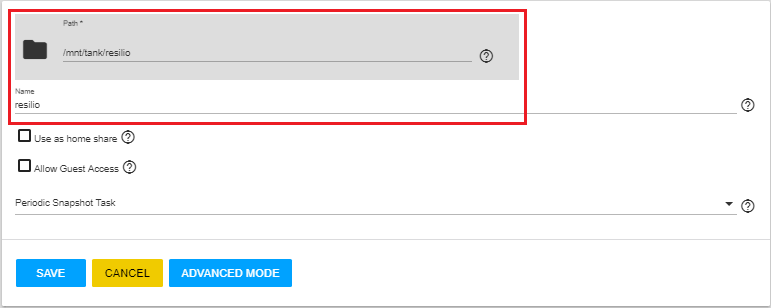
Step 4: Create the Windows backup share.
Sharing ⇒ Windows (SMB) Shares ⇒ Add
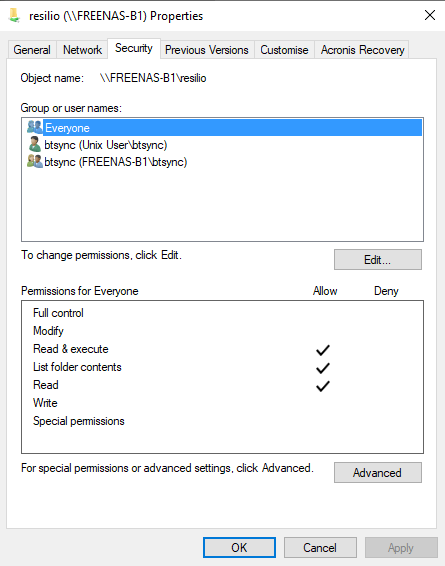
Step 5: Adjust permissions on the Windows share.
If you have problems with this step, please review the post Administrator Access to Windows Shares in FreeNAS (legacy).
Share permissions of the backup share when first viewed from Windows:
If you want to allow users to restore their own data, refer to this post and then skip to step 6. If one or a few nominated individuals are responsible for restoring user data, continue with step 5.
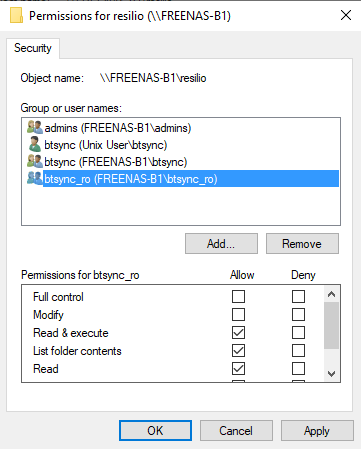
Adjust share permissions to allow administrators full access to the backup share, remove everyone access, but allow key personnel responsible for restoring user data (in this case belonging to the group btsync_ro) to have read access to the backup share.
Step 6: Add external storage to the Resilio Sync plugin.
If the plugin is running, stop the jail first.
Jails ⇒ rslsync ⋮ Stop ⇒ Stop
Add the mount point.
Jails ⇒ rslsync ⋮ Mount Points ⇒ Actions ⇒ Add Mount Point
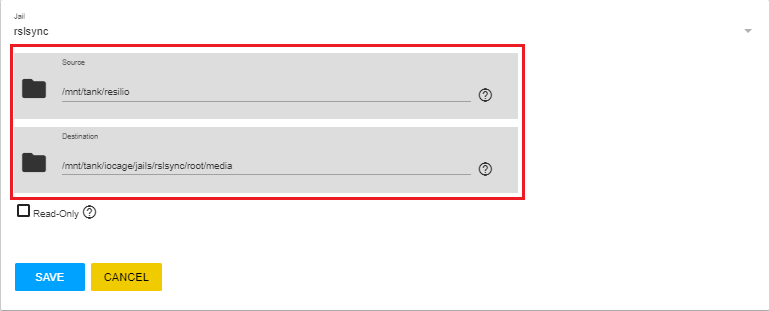
Start the jail.
Jails ⇒ rslsync ⋮ Start
Step 7: Start the Resilio Sync plugin on the server and set up defaults
If the plugin is not started, start it.
Plugins ⇒ Installed ⇒ rslsync ¦Start
Launch Resilio Sync
Plugins ⇒ Installed ⇒ rslsync ¦Management
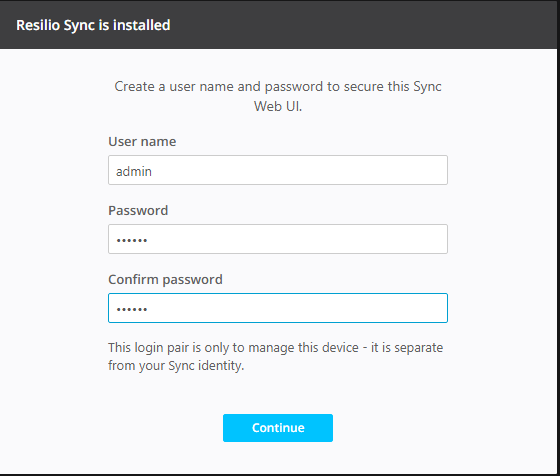
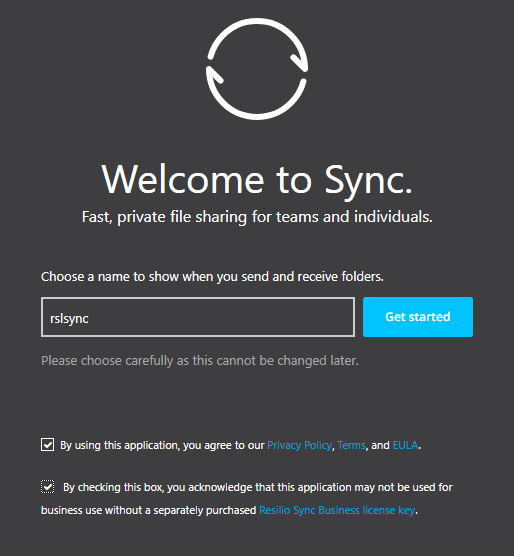
On entering Resilio Sync for the first time, you will be prompted to set up an account.
Next, you will be asked to choose a sync name for the sync server, and agree to terms of use. The default sync name is rslsync.
Next up, an optional newsletter subscription.

Finally, you’ll be presented with the Resilio Sync dashboard.
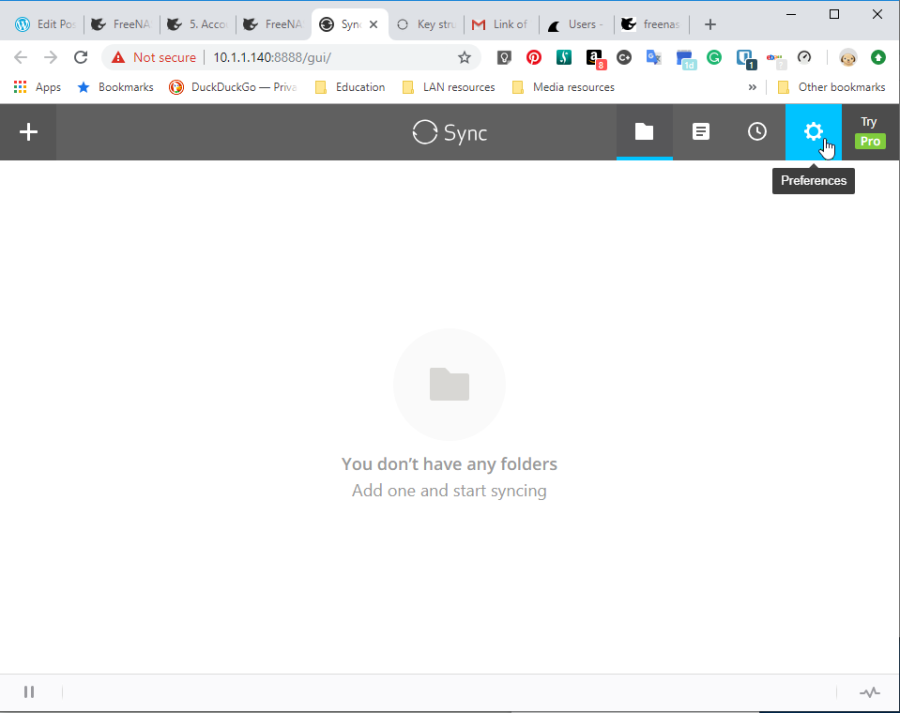
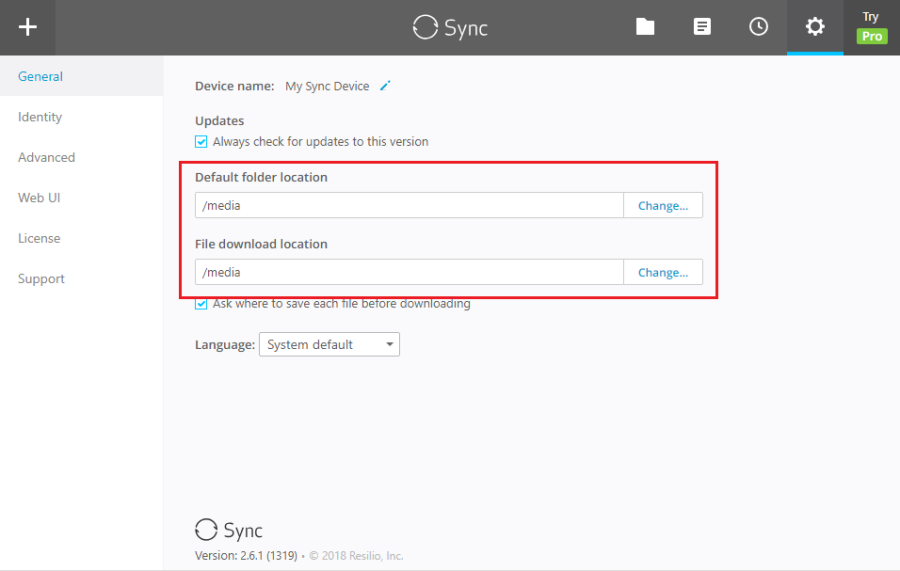
Click on Preferences (the gear icon in the top right corner), and change the preference for the Default folder location and File Download Location to /media.
Step 8: Install and configure client software.
Time to set up the client software. Several examples follow.
- Resilio Sync Setup for Android 4+ Clients (revised)
- Resilio Sync Setup for IOS 8+ Clients (revised)
- Resilio Sync Setup for Windows 7+ Clients (revised)
- Resilio Sync Setup for OS X 10.8+ Clients (revised)
Want your users to recover their own data? Check out Advanced Resilio Sync Setup for FreeNAS (revised).
References
